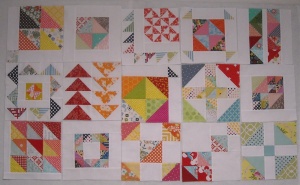
Did you get all your blocks made?
It’s time to set them all together now.
This part is completely up to you and your imagination and your own preferences.
I like the busy cluttered scrappy look of setting all my blocks right next to each other, so that’s the setting I’m showing you.
However, if you prefer less clutter and more negative space, there are a few things you could do to get that. Keep in mind, these options will make your quilt bigger, but that may also be what you want to do — anything goes!
My setting is going to be 5 blocks across and 6 blocks down.
I first put up half my blocks (1 from each pair) on my design wall, like I made them.
I thought the color balance was a bit off, so I rearranged them to spread the color out more evenly.
Better, but still not quite right, to my eye. I moved a couple around. Then simply turning some of the blocks a quarter turn and changing their orientation did the trick!
After I was satisfied with the first half, I put up the other half of the blocks and did the same thing, making sure they played nicely with the arrangement of the top blocks.
I finally settled on this layout, and set my blocks together.
I always sew my blocks together in pairs, then sew the pairs together in sections, then join the sections to complete the top. This way, I don’t have to work with really long seams except at the very end. I find it less stressful!
So I’ll give you a couple days to play around with the arrangement of your blocks and come up with something you like.
If you think this layout is too busy, and you prefer more negative space, consider adding plain sashing in between the blocks and rows. This will space them out so they’re not so crowded. It will also make the quilt bigger, if you’re going for larger than the original (which is 56″ x 66″).
Another option would be to use alternating plain blocks in a checkerboard fashion, which will also make the quilt larger and break up the scrappiness. You could also set the blocks on point for some added interest!
You could join the blocks into rows, then add plain fabric in strips between the rows. There are endless possibilities for what you can do with them, and I urge you to explore as many options as you want to. Put them on your design wall, leave it a while and come back to it — rearrange, add, subtract, just play! I’m very excited to see what you come up with!
I’ll be back on Wednesday to show you how I’m adding the borders to my quilt.


Leave a comment